
Replacing an ignition coil might sound like a daunting task, but it’s something you can do with a bit of guidance and the right tools. The ignition coil is a crucial component of your car’s ignition system, responsible for transforming the battery’s low voltage to the high voltage needed to create an electric spark in the spark plugs. This spark ignites the fuel, powering your engine. When your ignition coil fails, your car can experience misfires, poor fuel economy, and other performance issues.
Understanding the Ignition Coil
What is an Ignition Coil?
An ignition coil is an induction coil in the vehicle’s ignition system that converts the battery’s voltage into a much higher voltage. This high voltage is necessary to jump the gap in the spark plug, thereby igniting the air-fuel mixture in the engine’s cylinders.
How Does an Ignition Coil Work?
The ignition coil works on the principle of electromagnetic induction. When the car’s computer sends a signal, it interrupts the current flow through the coil’s primary winding. This interruption induces a high voltage in the secondary winding, which then travels to the spark plug to ignite the fuel mixture.
Types of Ignition Coils
There are several types of ignition coils, including:
- Conventional Ignition Coil: Used in older vehicles with distributors.
- Distributorless Ignition System (DIS) Coil: Used in more modern vehicles without a distributor.
- Coil-On-Plug (COP): Each spark plug has its own ignition coil.
Tools and Materials Needed
Basic Tools
- Wrenches and ratchet set
- Screwdrivers
- Pliers
Safety Gear
- Gloves
- Safety glasses
Replacement Ignition Coil
- Ensure it’s the correct type and model for your vehicle.
Preparation Steps
Ensuring Safety
Before you start, ensure the vehicle is parked on a flat surface with the engine turned off and cool to the touch.
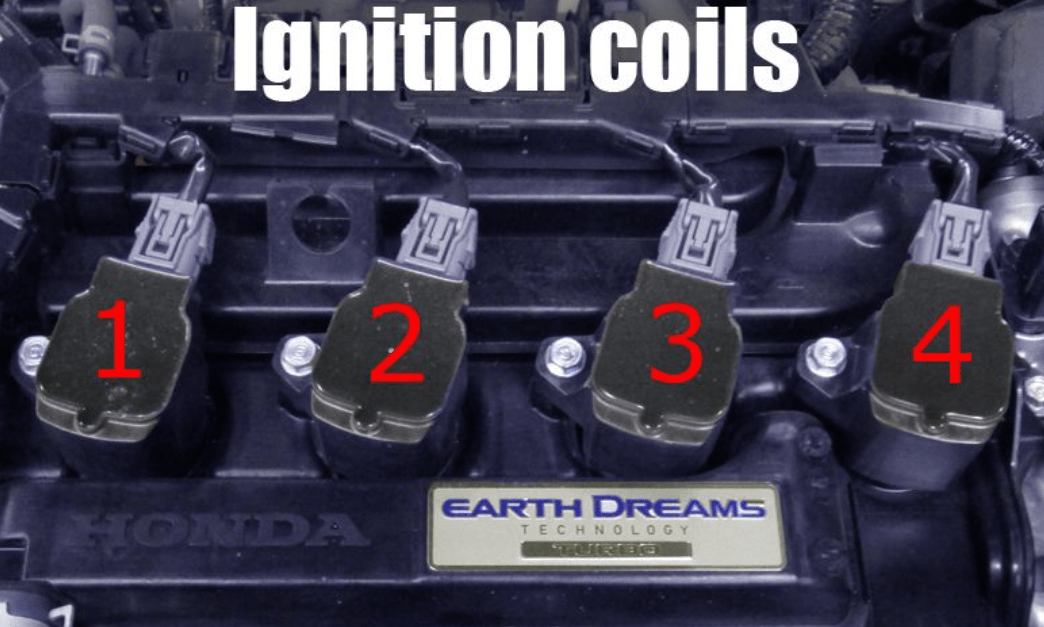
Locating the Ignition Coil
Refer to your vehicle’s manual to locate the ignition coil. In many vehicles, they are located near the top of the engine, close to the spark plugs.
Disconnecting the Battery
To prevent any electrical shocks or accidental startups, disconnect the negative terminal of the battery.
Removing the Faulty Ignition Coil
Disconnecting the Electrical Connector
Locate the electrical connector on the ignition coil and carefully disconnect it. You might need to press a tab or use a screwdriver to release it.
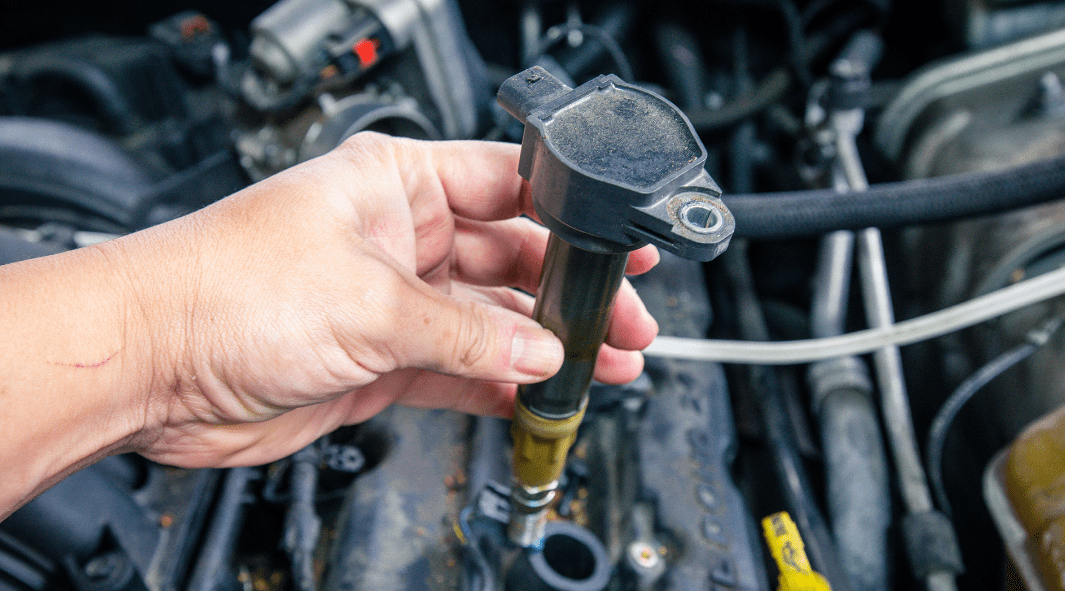
Removing the Ignition Coil
Using the appropriate tools, remove the bolts or screws holding the ignition coil in place. Carefully pull the ignition coil out.
Inspecting the Coil and Surrounding Area
Before installing the new coil, inspect the old one and the surrounding area for any signs of damage or oil leaks.
Installing the New Ignition Coil
Preparing the New Coil
Compare the new coil with the old one to ensure it’s the correct part. Clean the area around the installation point if necessary.
Installing the New Coil
Insert the new ignition coil into the place where the old one was. Secure it with the bolts or screws.
Reconnecting the Electrical Connector
Attach the electrical connector to the new ignition coil, ensuring it clicks into place.
Testing the New Ignition Coil
Reconnecting the Battery
Reconnect the negative terminal of the battery.
Starting the Engine
Start the engine and listen for any unusual noises. The engine should run smoothly if the installation was successful.
Checking for Proper Operation
Check for any warning lights on the dashboard. If the check engine light is still on, you may need to reset it or further troubleshoot.
Common Issues and Troubleshooting
Engine Still Misfiring
If the engine continues to misfire, the issue might not be the ignition coil. Check the spark plugs and ignition wires.
Check Engine Light
If the check engine light remains on, use an OBD-II scanner to read the trouble codes and address any other issues.
Unusual Noises
If you hear unusual noises, double-check the installation to ensure everything is properly connected and secured.
Maintenance Tips
Regular Inspections
Regularly inspect your ignition coils during routine maintenance to catch any issues early.
Signs of Wear and Tear
Look for signs of wear such as cracks, corrosion, or discoloration on the ignition coils.
When to Replace Again
Typically, ignition coils should last around 100,000 miles, but always refer to your vehicle’s manual for specific recommendations.
Conclusion
Replacing an ignition coil is a manageable task that can save you time and money. By following the steps outlined above, you can ensure your car runs smoothly and efficiently. Regular maintenance and inspections will help you catch issues early and keep your vehicle in top condition.
FAQs
How often should I replace my ignition coil? Ignition coils generally last around 100,000 miles, but it’s best to refer to your vehicle’s manual for specific recommendations.
What happens if I don’t replace a faulty ignition coil? A faulty ignition coil can lead to engine misfires, reduced fuel efficiency, and potential damage to other engine components.
Can I drive with a bad ignition coil? Driving with a bad ignition coil is not recommended as it can cause further damage to your engine and decrease performance.
How much does it cost to replace an ignition coil? The cost of replacing an ignition coil can vary but typically ranges from $100 to $300 depending on your vehicle make and model.
Are there any risks in replacing the ignition coil myself? While replacing an ignition coil is generally safe, improper installation can lead to further engine issues. Always follow the manufacturer’s guidelines and take necessary safety precautions.
Discover how to replace your car’s ignition coil with this easy step-by-step guide. Keep your vehicle running smoothly. Click here to learn more!